


Today I'll take a break from the JavaScript articles and write on something else I've been looking into over the past week. In my learning journey I like to have my feet and hands all over the place; for more learning and to also make sure I don't get bored and give up the learning cycle as it has happened before. Therefore, over the past 2 months or so I have been doing hands-on projects as well as Javascript challenges on freeCodeCamp and one or two articles on Medium and Hashnode.
A new venture 🚀
At the beginning of July, I spotted a She Code Africa tweet on #WOSCA challenge. WOSCA stands for Women of OSCA. This is an open-source challenge organized by She Code Africa & OSCA Africa to encourage more African women in technology to engage themselves in open source. The participants are to record their participation activities in a form and 10 participants with the most entries/contributions are to receive awards at the end of the challenge. You could check out details on the challenge here. (Kudos and thank you She Code Africa & OSCA Africa!💝).
I decided to participate in the challenge with the aim of learning and definitely with eyes on the awards and gifts. 🎉
Projects to contribute to
SCA was kind enough to provide us with articles and prior information on how to start as a complete beginner in open source and projects that we could contribute to. To be honest, this was the hardest part for me(before the SCA list was out); finding an open source project to contribute to.
I landed on the firstcontributions repo where I got to learn the basics of open source contributions. I also made my first contribution by adding my name to the contributors list. 🎉
More Reading
I did several searches and a couple reads to help me understand what exactly open source is and what it means to contribute to open source.
From my research, I learnt that open-source is public code that is freely-available and anyone can make changes to the project's code. The changes however are not directly accepted into the pre-existing code; they have to be reviewed before they are merged with the pre-existing code.
Where is this public code?
The public code is hosted/placed on a code hosting platform such as github. Therefore, one needs to be conversant with git commands and know how git and github operate.
What changes should I make?
On further reading, I got to learn about issues. Issues are a collection of bugs, feature additions and project tasks related to a project. As a first-time contributor you could pick an issue and work on it or decide on a change you'd like to make and add it as an issue. Read through the previous issues and learn how the project contributors handle the project issues.
The basics
After reading and going through this first contributions guide, I understood that the basics of any contribution are: fork-clone-edit-PR
1. Fork
Forking a repository creates a copy of the repository in your account. Forking is as easy as pie...you just select the fork button and that's it. 🎉

2. Clone
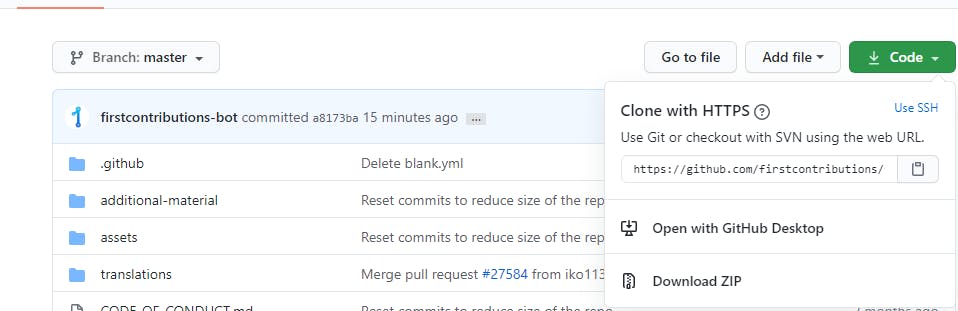
Cloning a repository creates a copy of the repository in your local machine. This is so that you can make changes with your code editor. Cloning is done using the git clone command followed by the url of the forked repository. How do i get the url? Just click on the Code button then copy the url.
Run the command on your terminal. (example of the full command:
git clone https://github.com/faithgaiciumia/first-contributions.git note that the url is different because you're not using my account.)
Create branch
After cloning, navigate to the new folder created and create a new branch where you'll push your changes after editing the code. Use the git checkout command. This command creates the branch(if it does not already exist) then moves you to that branch. Choose a branch name according to the changes you are making to make it easier to remember and also for conventionality.
git checkout -b add-contact-form
3. Edit
By now you already know what changes you want to make and in what file(s). Go ahead and make the changes. Make sure you follow the rules and guidelines given on the contributors.md file otherwise your changes will not be accepted. 😦
Add, commit and push changes
When you're done making the changes, save the file(s) then head over to your terminal to add, commit and push the changes to your branch.
Commands:
git add <file(s)>
git commit -m "commit message"
git push origin add-contact-form
Confirm changes
Once you've done this, head over to your forked repo on github and confirm whether the changes have been translated.
Click on the compare button to see your changes.

4. PR(Pull Request)
Once you confirm your changes you can now make your pull request and wait for it to be reviewed and merged. 🎉
The End.
💝 Additional resources and links to beginner-friendly projects are included in this doc.
💝 I am looking forward to contributing to more open source projects this month and in the future too and I hope it's the same for you too.
💝 Thank you for reading through.....feedback is always welcome and highly appreciated.
💝 Follow me on twitter where I share tweets on my coding journey. Thanks!