Building a Finance Management App with React Native - Part 2
Designing and Implementing the Onboarding Screens

Web Dev - Nairobi, Kenya
The app will have four onboarding screens implemented using a slider. Onboarding screens give the user basic information on what the app does and how to utilize the different features within the app. Onboarding screens can also be used to sign up users in a step-by-step manner. Step-by-step registration is interactive and will give the user a better UX compared to a single form with multiple inputs. For the app, I chose to have one content screen and three screens to do step-by-step registration.
Full App Code: Github Link
Wireframes and Design
I made a simple design on Figma with inspiration from Dribble and illustrations from icons8. Below are the designs to be implemented:

Creating React Native App
I started the implementation of the designs by creating the React Native app. This will make up the front-end part of the project. I used Expo, a quick tool that helps in building React Native apps without having to use Android Studio or XCode. For information on setting up the development environment and installation of required tools look up the React Native documentation page.
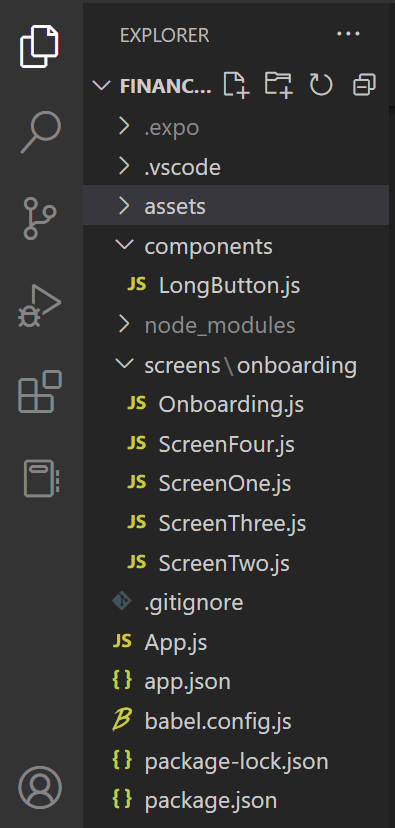
Next is setting up the project structure. I added two folders (Components and Screens) to the structure that was already there, and I put the onboarding images in the assets folder. The components folder will have UI features that will be reused on different pages. This includes cards, buttons, action sheets, etc. The screens folder, on the other hand, will have different app pages. The project structure is as below:
Setting up Navigation
This step is not necessary if you're not building the entire app with multiple pages. However, because I will add more pages as I develop the app, it is important to set up the navigation now. Navigation is simply the ability to move from one page to another. To enable navigation within the app, I will be using React Navigation.
Install React Navigation and its dependencies - these dependencies are supporting libraries for react-navigation
npm install @react-navigation/native
npx expo install react-native-screens react-native-safe-area-context
npm install @react-navigation/native-stack
Create the main navigation container in App.js and add the onboarding screen. The navigation container will hold all the screens added to the app and will enable navigation from one screen to another. For every screen, I specify a route name (which will be used to refer to the page whenever you need to navigate to the page), the component (the JS file with the page's code), and other options such as the header title or whether to show the header or not. Since I don't want the header shown on the onboarding screens, I set header shown to false. Also, I specified an initial route name, which will be the first page to be displayed.
The code in App.js:
import { NavigationContainer } from "@react-navigation/native";
import { createNativeStackNavigator } from "@react-navigation/native-stack";
import Onboarding from "./screens/onboarding/Onboarding";

const Stack = createNativeStackNavigator();

export default function App() {
  return (
    <NavigationContainer>
      <Stack.Navigator initialRouteName="onboarding">
        <Stack.Screen
          name="onboarding"
          component={Onboarding}
          options={{ headerShown: false }}
        />
      </Stack.Navigator>
    </NavigationContainer>
  );
}
Implementing the designs
Now that I have the navigation set up, I can now proceed to create the three screens and add the content and styling.
I have the following screens and components:
Onboarding.js
ScreenOne.js
ScreenTwo.js
ScreenThree.js
ScreenFour.js
Component - LongButton.js
Onboarding.js
import { Text, View } from "react-native";
import Swiper from "react-native-swiper";
import ScreenFour from "./ScreenFour";
import ScreenOne from "./ScreenOne";
import ScreenTwo from "./ScreenTwo";
import ScreenThree from "./ScreenThree";

export default function Onboarding(){
    return(
        <Swiper showsButtons={false} activeDotColor="#12B886" loop={false} paginationStyle={{ bottom: "13%" }} >
            <ScreenOne/>
            <ScreenTwo/>
            <ScreenThree/>
            <ScreenFour/>
        </Swiper>
    )
}
This is the main screen holding the different slides. To implement the sliding effect, I used React-native-swiper. I specified the dot color, disabled looping and buttons as I was going to use a different set of buttons.
ScreenOne.js
import {
  Dimensions,
  Image,
  StyleSheet,
  Text,
  TouchableOpacity,
  View,
} from "react-native";
import LongButton from "../../components/LongButton";

export default function ScreenOne() {
  return (
    <View style={styles.container}>
      <Image
        source={require("../../assets/img/onb.png")}
        style={styles.onbImg}
      />
      <Text style={[styles.heading]}>
        Be in Control of your finances, save and invest in your future
      </Text>
      <Text style={styles.text}>
        We provide you with an avenue to record your daily spending, and
        earning. A way to track how much money you’re using and how much is
        coming in.{" "}
      </Text>
      <View style={styles.row}>
        <TouchableOpacity style={styles.button}>
          <LongButton text="Getting Started" />
        </TouchableOpacity>
      </View>
    </View>
  );
}

const styles = StyleSheet.create({
  container: {
    flex: 1,
    justifyContent: "flex-start",
    alignItems: "flex-start",
    alignContent: "center",
    backgroundColor: "#fff",
  },
  onbImg: {
    width: Dimensions.get("screen").width,
    height: 600,
  },
  heading: {
    marginTop: -30,
    fontFamily: "PoppinsBold",
    fontSize: 24,
    width: "80%",
    marginHorizontal: 20,
  },
  text: {
    margin: 20,
    fontFamily: "PoppinsMedium",
    fontSize: 12,
  },
  button: {
    marginHorizontal: 20,
    marginTop:50,

  },
  row:{
    flexDirection:"row",
    justifyContent:"center",
    width:Dimensions.get('screen').width,
  }
});
ScreenTwo.js
import { TextInput } from "@react-native-material/core";
import {
  Dimensions,
  Image,
  StyleSheet,
  Text,
  TouchableOpacity,
  View,
} from "react-native";
import LongButton from "../../components/LongButton";

export default function ScreenTwo() {
  return (
    <View style={styles.container}>
      <Image
        source={require("../../assets/img/onb.png")}
        style={styles.onbImg}
      />
      <Text style={[styles.heading]}>Tell us your name</Text>
      <TextInput label="Name" variant="outlined" style={styles.textInput} />
      <View style={styles.row}>
        <TouchableOpacity>
          <Text style={styles.btnTxt}>Back</Text>
        </TouchableOpacity>
        <TouchableOpacity>
          <Text style={styles.btnTxt}>Next</Text>
        </TouchableOpacity>
      </View>
    </View>
  );
}

const styles = StyleSheet.create({
  container: {
    flex: 1,
    justifyContent: "flex-start",
    alignItems: "flex-start",
    alignContent: "center",
    backgroundColor: "#fff",
  },
  onbImg: {
    width: Dimensions.get("screen").width,
    height: 600,
  },
  heading: {
    marginTop: -30,
    fontFamily: "PoppinsBold",
    fontSize: 24,
    width: "30%",
    marginHorizontal: 20,
  },
  text: {
    margin: 20,
    fontFamily: "PoppinsMedium",
    fontSize: 12,
  },
  button: {
    margin: 20,
  },
  row: {
    flexDirection: "row",
    justifyContent: "space-between",
    width: Dimensions.get("screen").width - 40,
    marginHorizontal:20,
    marginTop:100
  },
  textInput: {
    width: Dimensions.get("screen").width - 40,
    margin: 20,
  },
  btnTxt:{
    color:"#12B886",
    fontFamily:"PoppinsMedium"
  }
});
ScreenThree.js
import { TextInput } from "@react-native-material/core";
import {
  Dimensions,
  Image,
  StyleSheet,
  Text,
  TouchableOpacity,
  View,
} from "react-native";
import LongButton from "../../components/LongButton";

export default function ScreenThree() {
  return (
    <View style={styles.container}>
      <Image
        source={require("../../assets/img/onb.png")}
        style={styles.onbImg}
      />
      <Text style={[styles.heading]}>Tell us your email</Text>
      <TextInput label="Email" variant="outlined" style={styles.textInput} />
      <View style={styles.row}>
        <TouchableOpacity>
          <Text style={styles.btnTxt}>Back</Text>
        </TouchableOpacity>
        <TouchableOpacity>
          <Text style={styles.btnTxt}>Next</Text>
        </TouchableOpacity>
      </View>
    </View>
  );
}

const styles = StyleSheet.create({
  container: {
    flex: 1,
    justifyContent: "flex-start",
    alignItems: "flex-start",
    alignContent: "center",
    backgroundColor: "#fff",
  },
  onbImg: {
    width: Dimensions.get("screen").width,
    height: 600,
  },
  heading: {
    marginTop: -30,
    fontFamily: "PoppinsBold",
    fontSize: 24,
    width: "30%",
    marginHorizontal: 20,
  },
  text: {
    margin: 20,
    fontFamily: "PoppinsMedium",
    fontSize: 12,
  },
  button: {
    margin: 20,
  },
  row: {
    flexDirection: "row",
    justifyContent: "space-between",
    width: Dimensions.get("screen").width - 40,
    marginHorizontal:20,
    marginTop:100
  },
  textInput: {
    width: Dimensions.get("screen").width - 40,
    margin: 20,
  },
  btnTxt:{
    color:"#12B886",
    fontFamily:"PoppinsMedium"
  }
});
ScreenFour.js
import { TextInput } from "@react-native-material/core";
import {
  Dimensions,
  Image,
  StyleSheet,
  Text,
  TouchableOpacity,
  View,
} from "react-native";
import LongButton from "../../components/LongButton";

export default function ScreenFour() {
  return (
    <View style={styles.container}>
      <Image
        source={require("../../assets/img/onb.png")}
        style={styles.onbImg}
      />
      <Text style={[styles.heading]}>Set a Password</Text>
      <TextInput label="Password" variant="outlined" style={styles.textInput} />
      <TextInput label="Confirm Password" variant="outlined" style={styles.textInput} />
      <View style={styles.row}>
        <TouchableOpacity style={styles.button}>
          <LongButton text="Done" />
        </TouchableOpacity>
      </View>
    </View>
  );
}

const styles = StyleSheet.create({
  container: {
    flex: 1,
    justifyContent: "flex-start",
    alignItems: "flex-start",
    alignContent: "center",
    backgroundColor: "#fff",
  },
  onbImg: {
    width: Dimensions.get("screen").width,
    height: 570,
  },
  heading: {
    marginTop: -30,
    fontFamily: "PoppinsBold",
    fontSize: 24,
    width: "30%",
    marginHorizontal: 20,
  },
  text: {
    margin: 20,
    fontFamily: "PoppinsMedium",
    fontSize: 12,
  },
  button: {
    marginHorizontal: 20,
  },
  row: {
    flexDirection: "row",
    justifyContent: "space-between",
    width: Dimensions.get("screen").width - 40,
    marginHorizontal:20,
    marginTop:40
  },
  textInput: {
    width: Dimensions.get("screen").width - 40,
    marginHorizontal: 20,
    marginTop:5,

  },
  btnTxt:{
    color:"#12B886",
    fontFamily:"PoppinsMedium"
  }
});
LongButton.js
import { StyleSheet, View, Text } from "react-native";

export default function LongButton({text}) {
  return (
    <View style={styles.button}>
      <Text style={styles.btnTxt}>{text}</Text>
    </View>
  );
}

const styles = StyleSheet.create({
  button: {
    backgroundColor: "#12B886",
    width: 315,
    padding: 20,
    borderRadius: 12,
  },
  btnTxt:{
    color:"#fff",
    textAlign:"center",
    fontSize:18,
    fontFamily:"PoppinsBold"
  }
});
For the screens and the component, there's no much logic. For now, I have used JSX and CSS styling to create a design similar to what I had in Figma. Now the app can display the four onboarding screens and the user can swipe through them. In the next part, I work on the step-by-step registration and inputs validation.
Output
Thank you for reading. Please share your thoughts and feedback.